Gardening can be a rewarding hobby, but it can be a frustrating experience when the gardening tools do not function as expected or damage your plants. But this does not have to be the case; as long as you take proper care of the tools, there is no reason why they shouldn’t serve you well and last longer for years. If you look after your tools, they will treat you well.
Here are five ways to make your gardening tools last longer.
- Clean your tools after every use
Ideally, cleaning is one of the most important maintenance tasks for the longevity of your gardening tools. Always clean your gardening tools after every use to remove any dirt accumulation and keep your tools in tip-top shape and make them last longer. Cleaning can be as simple as using a hose to blow away grass cuttings from your lawn mower blades or wiping off the blades with an old rag.
You can also use hosing to clean digging tools and any other tool that come into contact with soil before storing. Any dried mud should be removed with a screwdriver or soaking the tool first before wiping it with an old rag. The metal parts should then be coated with oil to help prevented corrosion from moisture or rusting. All tools used for chemical applications should be cleaned thoroughly to prevent the chemical from corroding the metals parts.
Create some cleaning time every day and make it habit to clean the tools before storing them. Having running water around make cleaning your tools much easier but ensure to pick a cleaning spot where the excess water doesn’t do more damage.
- Sharpen your tools
Sharpening your cutting tools will not only make them last longer but also make them function like new. Besides, sharp tools not only save you time but also safe to operate. All you need is to pick your sharpening devices like a bench grinder or a flat-file and make a few passes over blades, hoes, spades whenever they feel dull.
For experienced gardeners, it only takes a few seconds to smooth out the burrs, and the good thing is you can carry the file with you for quick tune-ups when needed. The tools are likely to remain sharp for some time, and you may only need to sharpen them once in a year. If you are unable to sharpen the tools, there are specialists who can help you to sharpen the cutting tools within your local area.
- Clean and oil your pruning tools frequently
Your pruning tools are prone to rust from residue build-up, so they will need to be well cared for to ensure a cleaner cut and make pruning effortless. The other advantage of keeping your pruning tools clean is to help stop the spread of lawn diseases. You can start by ensuring that the tools are clean by removing any ingrained dirt by washing them with soapy water and dry them. This should be followed by adding a few drops of your preferred lubricating oil to the blades and pivot joints to dissolve rust and prevent corrosion.
Ensure to tighten the moving parts and replace any part if needed, and don’t forget to apply the lubricant regularly, especially during heavy periods of pruning. If the pruners are dull, they will need to be sharpened to avoid tearing or crushing the plants. If the pruners are nicked, consider replacing them. In addition to the daily cleaning, you can make a solution of chlorine and water (5:1) for dipping the pruning before moving to the next plant to prevent the spread of diseases through your garden.
- Inspect the wooden handles
Don’t forget about the wooden handles on your spades, loppers, rakes, among other gardening tools. At the end of the planting season, use a stiff brush and soapy water to give the handles a good scrub to remove soil and dirt accumulated in the crevices. Alternatively, you can use a damp rag and a metal brush to clean dry the handles, and if you see any signs of splintering, you can use a sandpaper to smooth them.
Once the handles are clean and dry, use a clean rag to apply a coat of oil to keep the handles from becoming brittle and repel any moisture and dirt. Reapply the finishing oil if necessary and wipe off any excess oil before you store the tools.
- Always store your tools properly
All gardening tools should be stores in a protected place, preferably indoors and in a dry place. If you live in a humid climate, always bring your tools under a cover, preferably inside your garage or a shed, to prolong their lifespan. Ideally, the storage area should be close to your garden for ease of transport, but either way, you may need to carry around the garden or to the area where you need them.
For the small hand-held tools, you can fill a pot/bucket with sand and mix with oil to help preserve and clean the metal parts between uses. Ensure to store the bucket in a place where water can’t get in and keep the tools in an upright position for easy access.
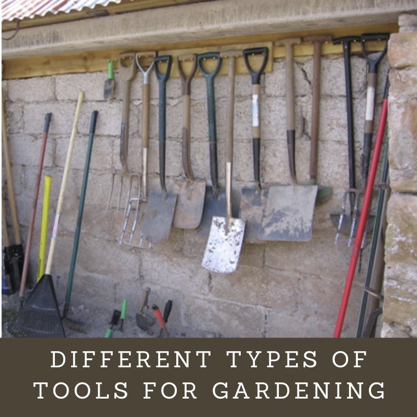
The long-handled tools should also be stored indoors, preferably hanging up on the wall when possible. This will prevent the tools from banging into each other especially, those with sharp edges while ensuring that they do not get in your way.
You need to be creative with your storage space, especially with the awkwardly shaped tools. If hanging is impossible, consider a shelving unit for tools that cannot be hooked or those with an awkward shape. The bottom line is to ensure good organization in the storage area by having a place for every tool and avoiding moving tools that you do not often use unnecessarily.
Remember, water or wet soil is an enemy of gardening tools, so always rinse any mud off your tools and dry them thoroughly before storing them.
Conclusion
Sometimes no matter how careful you are, the tools do break or get damaged, especially when pushed to the limit. When this happens, the first thing that comes into your mind is getting a replacement. However, most tools are fixable, and it doesn’t have to cost you a lot of money. For instance, for a tool such as a spade, you can get a replacement handle if the existing one is broken instead of buying a new spade.
You can also take advantage of the warranty provided by the manufacturer if you have issues with the tools. If you can’t repair the tool, you can just put your creative hat and repurpose it for other uses instead of throwing it away. Remember to invest time and effort to maintain your tools to make your gardening work easier without having to buy new tools.